

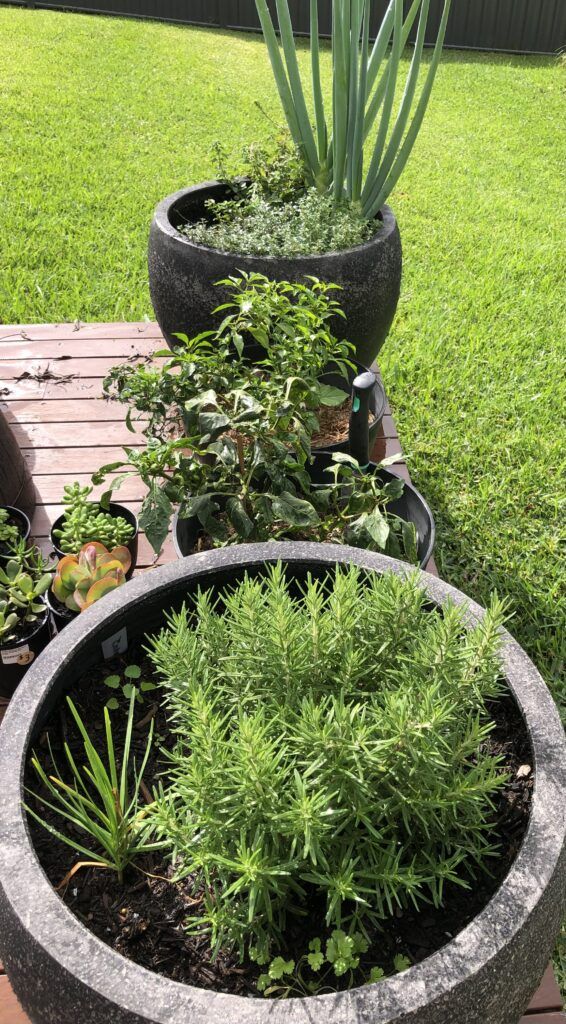
I’ve been growing food my whole life, as a kid growing up on a farm, as an adult on my own acreage and now on a smaller scale in my backyard! There’s nothing yummier or more satisfying for me and I still get excited with every new thing that pops up in the patch, it is one of the simple joys in my life!
Growing herbs in pots is a fun and yummy adventure that provides many benefits—not only do you get fresh, aromatic flavours right from your, backyard, windowsill or balcony, but you also get the therapeutic benefits of tending to your own mini garden. Whether you are new to gardening or looking to simplify your food growing, herbs in pots is a great way to start!
Simple, Rewarding and Beneficial
Herb gardening in pots is very versatile and great for those with limited space or living in a variable climate, where outdoor gardening is a seasonal affair. The simplicity of pot gardening allows you to control the environment your plants grow in and manage everything from soil type to sunlight exposure and watering schedules. Keeping your plants close to the house makes it easier to harvest your herbs and keep a watchful eye on their health and needs. Below I’ll help guide you through the following:
- Understanding the Basics: Light, Soil, Water, Compost and Fertiliser
- Choosing the Right Herbs for Your Climate and Space
- Beyond the Windowsill: Other Indoor Gardening Solutions
- Plant, Pot, Prosper: Basic Tools for the Potty Herb Gardener
- Herb Growing Made Easy: A Step-by-Step Guide
- Common Challenges: Signs Your Plants Are Struggling
- Healthy Herbs: Essential Troubleshooting Tips
- The Joy of Harvesting: Tips for Harvesting, Using and Preserving Your Homegrown Herbs
- Growing Food: A Holistic Approach to Health and Wellness
- If You’d Like to Dive Deeper into Herb Gardening – Some Great Books I Recommend!
Here’s the scoop! When you click and purchase through our links, you’re not just nurturing your garden, you’re helping us grow too! It doesn’t cost you any extra, but it supports us in bringing you the best free planting tips and garden wisdom. Together, we’re planting seeds of success!
Understanding the Basics: Light, Soil, Water, Compost and Fertiliser
To successfully grow happy herbs in pots and small spaces, there’s a few basic things they need: adequate light, the right type of soil, proper nutrition and consistent water, so let’s look at each of these a little closer.
Light: Most herbs need full sunlight, which typically means about six to eight hours of direct sun per day. This is really important for sun-loving herbs like basil, thyme, and oregano, so if you’re growing herbs indoors, you could place these herbs on a windowsill that gets sunlight throughout the day. For less light-intensive herbs, like mint or parsley, a windowsill that gets filtered light or sunlight for only part of the day might be ok for these herbs.
Soil: Herbs need well-draining soil to promote healthy growth and avoid root diseases. Choosing a high-quality potting mix specifically designed for container gardening gives you the best chance. This mix often includes perlite or vermiculite, which helps aerate the soil and improve drainage. Garden soil is not good for this purpose as it can be too dense, retain excessive moisture, and potentially introduce pests and diseases to your container garden.
Compost and Fertiliser: While potting mix provides a good starting base, herbs will flourish with additional nutrients. Mixing a little compost into your potting soil can enhance its nutritional content. Compost provides a slow-release source of organic nutrients, which is ideal for herbs. For a more targeted approach, you can also use a liquid fertilizer designed for edible plants, applying it every few weeks according to the product instructions. Be cautious not to over-fertilise, as too much can harm your herbs and even alter the taste of them. A balanced, organic fertilizer typically works best, promoting steady growth without the risk of chemical buildup in your pots.
Water: Watering needs can vary significantly among different herbs, but the general rule of thumb is to keep the soil slightly moist but never waterlogged. Overwatering is a common issue in herb gardening and can lead to root rot and fungal infections. Your pots should have adequate drainage holes and let the top 2cm (1 inch) of soil dry out before watering again so you’re not overdoing it.

Choosing the Right Herbs for Your Climate and Space
Growing herbs in any climate can be successful as long as you consider your local climate and the amount of daily sunlight your growing space receives, then select herbs that thrive in these conditions. Here are a few tips for some of the best herbs to grow in pots within different climates:
Hot Picks: Top Herbs for Warmer Climates
Select herb varieties that are well-adapted to the heat and thrive in drier climates. Here’s some suggested herbs that thrive in these conditions:
- Basil: Loves warmth and sun, requires well-draining soil, and thrives with six to eight hours of sunlight daily.
- Rosemary: Drought-tolerant, prefers full sun, and flourishes with minimal water once established.
- Thyme: Enjoys full sun and is also drought-tolerant; grows well even in poor, rocky soil.
- Oregano: Robust and flavourful in hot, sunny environments; needs well-draining soil and minimal watering.
- Sage: Prefers full sun and dry conditions, with leaves adapted to conserve moisture.
- Lavender: Thrives in well-drained, slightly alkaline soil; needs full sun and good air circulation.
- Lemongrass: Enjoys heat and humidity; requires full sun and consistent moisture.
- Mint: Adaptable to heat if watered adequately; can become invasive, so often planted in containers.
Cool Companions: Best Herbs for Cold Climates
Select herb varieties that are well-adapted to lower temperatures and potentially shorter growing seasons. Here’s some suggested herbs that are suitable for these conditions:
- Parsley: Tolerates cooler temperatures and can survive light frosts. It prefers full sun but can handle partial shade.
- Chives: Very cold-hardy and one of the first herbs to pop up in the spring. Chives can grow in full sun to partial shade.
- Mint: Extremely hardy and prefers full sun to partial shade and moist, well-draining soil.
- Cilantro: Prefers cooler weather and grows best in full sun to partial shade.
- Thyme: While it enjoys the sun, it can be hardy in cold weather. It needs well-draining soil and can tolerate dry conditions.
- Sage: Hardy in cold weather, sage prefers full sun and well-draining soil.
- Dill: Prefers cooler temperatures but needs full sun to grow properly.
- Oregano: Although it loves warmth, it’s hardy and can withstand cold temperatures if in full sun.
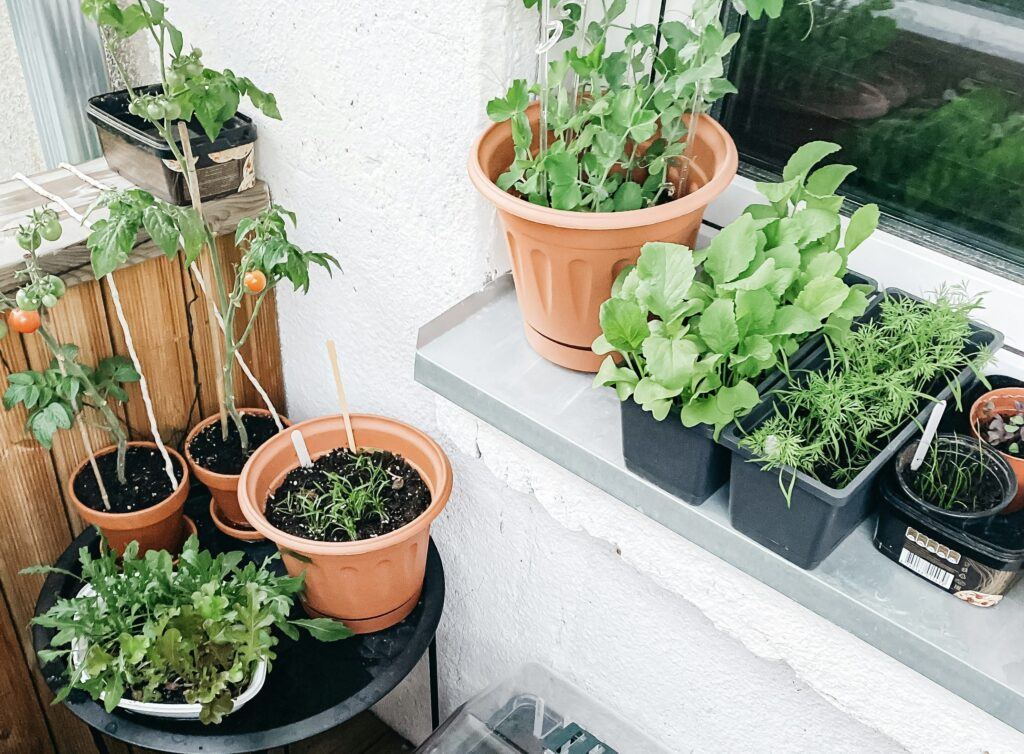
Windowsill Wonders: Herbs That Thrive Indoors
Growing herbs indoors in pots is a fantastic way to keep fresh flavours close at hand in your kitchen. They can be quite sensitive to their environment though and different spots in your home might create microclimates that are either beneficial or detrimental to some herbs. For example, a kitchen might have fluctuating temperatures due to cooking, which some herbs might find stressful, or some window sills may get too much shade for some sun loving herbs. Experiment by placing herbs in various locations around your home to discover the best spots for each one to thrive!
Here are some suggested herbs that adapt well to indoor conditions, provided they get enough light and proper care:
- Basil: Thrives in warm conditions and plenty of sunlight. Keep it on a sunny windowsill and water regularly to keep the soil moist but not soggy.
- Mint: Extremely versatile and easy to grow indoors. It prefers indirect light and moist soil.
- Chives: Requires minimal care and grows well in moderate sunlight. They’re perfect for a less sunny spot that receives indirect light.
- Parsley: Prefers full sun but will grow in indirect light as well. Keep the soil consistently moist for best growth.
- Cilantro: Needs a lot of light to thrive, so a windowsill is ideal. It prefers cooler temperatures, which makes it a great herb for indoor growth.
- Thyme: Loves plenty of sunlight and well-draining soil to prevent root rot.
- Oregano: Requires lots of light and will do well in a bright, indirect light setting. Water when the soil surface feels dry.
- Rosemary: Prefers bright, direct light and needs well-draining soil.
Beyond the Windowsill: Other Indoor Gardening Solutions
For those that really want to grow their own herbs but live in climates that make even indoor windowsill gardens difficult wuth low natural light, have physical limitations that make it challenging, or simply don’t have the time to maintain a garden, there are other options for you too!
Indoor hydroponic systems like the iDOO Hydroponics Growing System offer a fantastic solution. This system allows you to cultivate herbs indoors all year-round, regardless of outdoor weather conditions. It’s designed to be user-friendly, making it ideal for beginners. This system uses a water-based solution rich in nutrients, eliminating the need for soil, and features an automated LED light, ensuring your herbs receive the perfect amount of light without any manual adjustment. This method not only simplifies the growing process but also accelerates plant growth, allowing you to enjoy fresh herbs faster and with minimal effort.
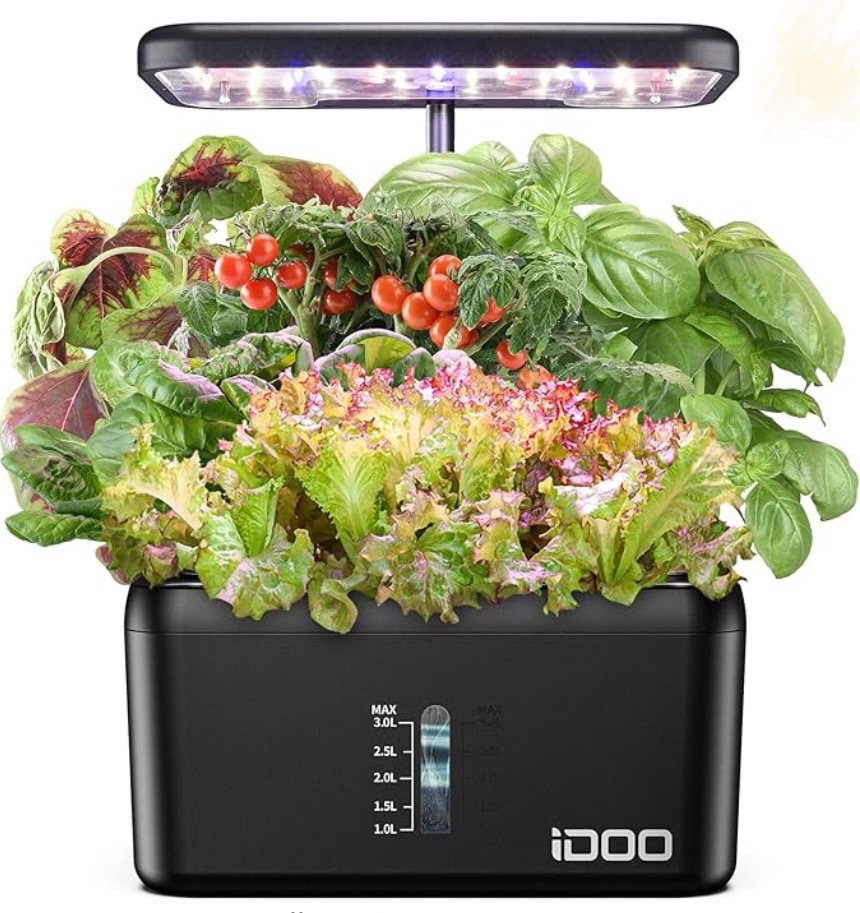
They come in varying sizes depending on your needs:
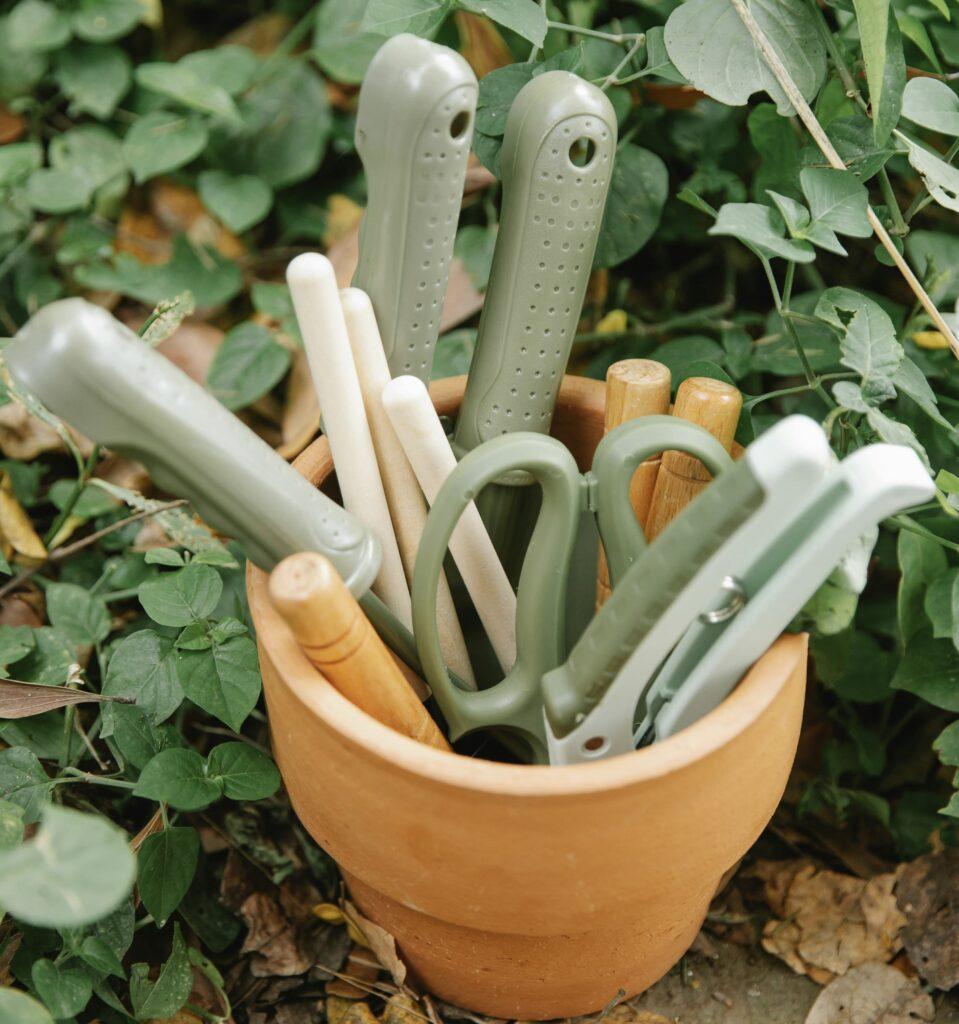
Plant, Pot, Prosper: Basic Tools for the Potty Herb Gardener
There are a few basics things that you may need to get going, you might already have some of them and just need a few extra items, or you may be starting from scratch and find it easier with a full gardening tool kit that contains most of them. Here’s a basic list along with some tips to help you choose and use each one effectively:
- Pots:
- Choosing the Right Size: Choose some pots that are large enough to accommodate the root growth of the herbs you plan to grow. For most common herbs, pots with a diameter of 15-30cm (6-12 inches) would be fine, or you may like to put them all together in a larger pot, a vertical herb tower, or some decorative windowsill pot sets, the options are endless, choose something that resonates with you!
- Good Drainage: Each pot should have at least one good drainage hole to prevent water logging.
- Materials: Pots made from porous materials like terra cotta, can help manage soil moisture in cooler climates, or ones made from plastic or lighter metals are easier to move around if you have lifting limitations and can retain moisture longer in warmer climates. So choose pots that suit you and where you live.
- Watering Can or Hose:
- Precise Watering Tools: A small watering can with a long spout is perfect for watering indoors or young seedlings gently. For larger or outdoor herb gardens, a hose with a soft spray or shower attachment can be used to water more evenly and extensively.
- Trowel:
- For Planting and Transplanting: A sturdy trowel makes digging, moving soil, and planting or transplanting herbs much easier. Look for a trowel with a comfortable handle and a durable metal blade. Ergonomic designs can reduce hand and wrist fatigue, which is helpful during longer gardening sessions.
- Pruners:
- Keeping Herbs Healthy and Productive: A pair of sharp, high-quality pruners for harvesting your herbs and performing regular pruning to encourage bushy growth and prevent overcrowding is a great investment. Cleaning and sharpening your pruners regularly helps prevent damage and disease spreading in your herb garden.
- Additional Helpful Tools:
- Gloves: A good pair of gardening gloves can protect your hands from cuts and scrapes, sharp edges, and soil-borne bacteria.
- Label Sticks and Permanent Marker: Keep track of what you’re growing with labels, weatherproof labels and a permanent marker will withstand the elements better and last longer. Think about using labels made of material that is kinder to the planet such as wood or bamboo.
Herb Growing Made Easy: A Step-by-Step Guide
Here’s a step-by-step guide to help you get your herb garden started!.
Selecting Your Herbs – Seedling v Seeds!
- Seedlings: These are young plants already started for you, often available at nurseries and garden centres. Choosing seedlings can give you a head start, as they have already passed the delicate germination stage. This is beneficial for beginners or those looking for quicker results. However, seedlings can be more expensive than seeds and offer fewer variety options..
- Seeds: These provide a broader range of choices, including rare and heirloom varieties not typically available as seedlings. Starting herbs from seeds can be more cost-effective and rewarding, as it allows you to experience the entire growth process from the very beginning. It’s an excellent educational opportunity, especially if you’re gardening with children. The main consideration is time; seeds require patience as they need to germinate and mature, which can take several weeks or even months. Additionally, seeds have a learning curve and may require careful attention to factors like moisture, temperature, and light.
Preparing and Filling Your Pots
- Preparing Pots: Make sure each pot has good drainage holes. If not, you can drill some additional holes or for extra drainage support, add a layer of gravel, pebbles or broken pottery at the bottom of your pots.
- Filling Pots: Fill the pot with potting and compost mix, leaving roughly about 5cm (2 inches) of space from the top. This space helps prevent water from spilling over the edge when watering.
Planting Herb Seedlings
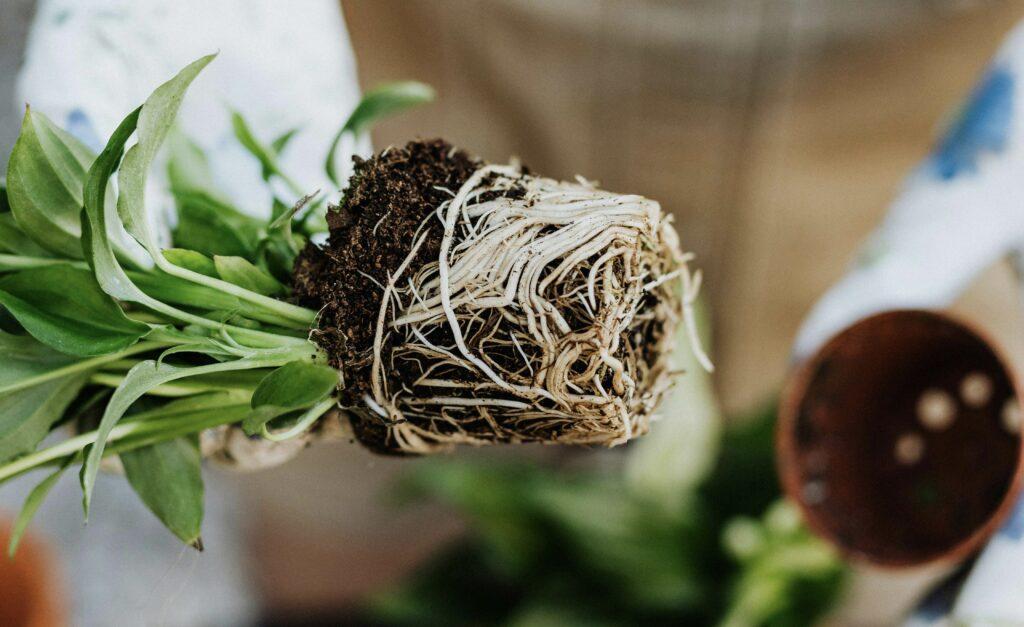
- Removing From Container: Carefully remove the herb plant from its container. If the plant is stuck, you can tap the container’s sides and bottom gently to loosen it without pulling on the plant to hard.
- LoosenIng the Root Ball: Gently tease the roots apart if they are densely packed or circling the base, this is just like tickling it with your fingers gently until the roots loosen a little. Teasing encourages the roots to grow outward into the new soil rather than continuing in a circle.
- Positioning the Plant: If planting single herbs in seperate pots, place it in the centre of the pot and dig a hole the size of the root ball, place the plant into the hole so the top of the root ball is level with the soil – about 5cm (2 inches) below the rim of the pot to allow room for watering.
- Filling in Around the Roots: Add more potting mix around the herb plant root ball until it is covered, then gently press the soil down around the plant to remove air pockets and secure the plant in the soil. Be careful not to compact the soil too much though, as this can inhibit water penetration and root growth.
- Planting Multiple Herbs Together: If you’re planting multiple herbs in a larger pot, arrange the plants while they are still in their seedling containers, this helps you visualise the layout and adjust spacing to make sure each herb has enough room to grow. You can place taller herbs in the centre or at the back of the pot, with shorter or trailing herbs towards the edges.
- Water Them In: After planting the seedlings, gently wet the soil surface to moisten. A small watering can with a long spout is great for this purpose.
Planting Herb Seeds
- Sowing Depth: Herb specific information including sowing depth should be on the seed packets, as this varies between herbs. If not, a general rule of thumb is to plant seeds at a depth twice their size. Small seeds like thyme can be sprinkled on the soil surface, then covered with a thin layer of soil over the top.
- Spacing: If planting multiple types of herbs in one pot, sow seeds in small clusters or rows, keeping each type of herb separated to avoid confusion once they sprout. Read through the seed information of mature plant size etc and give each cluster of seeds enough room to grow.
- Water Them In: After sowing the seeds, gently mist the soil surface with water to moisten without causing the seeds to move. A spray bottle works well for this purpose.
- Light: Most herb seeds require plenty of light to germinate effectively. Place the pots in a location where they can receive gentle, indirect sunlight or under grow lights.
- Warmth for Germination: Maintain a steady temperature suitable for the specific herb seeds you are planting. Generally, a range of 18-21°C (65-70°F) is favourable for most herb seeds to germinate. If you are in a colder climate, you could keep your seeds indoors where it’s warmer, place pots on a heat mat, cover pots with a propagation dome or use a mini greenhouse.
- Thinning Seedlings: Once seedlings emerge and develop their first set of true leaves, thin them to prevent overcrowding. Choose the strongest seedlings to keep and gently pull out the weaker ones.
Transition to Growing Conditions
- Hardening Off: If you plan to move your seedlings to a new place, for example from indoors to outdoors, they will be happier if gradually introduce them to their new conditions. Begin by placing them in a shaded and protected area for a few hours each day, gradually increasing their exposure to sunlight and outdoor temperatures over a week or two.
Following these steps for planting will create a stable environment for your herbs to thrive, leading to a lush and productive herb garden. Remember, the key to successful container gardening lies in proper soil preparation, adequate spacing, and ensuring each plant has enough room to establish its root system.
Common Challenges: Signs Your Plants Are Struggling
Keeping an eye on your potted herbs for signs of distress is crucial for maintaining a healthy garden. Here are some common indicators that your herbs might not be happy:
- Discolored Leaves: Yellow, brown, or black leaves can indicate a range of issues from nutrient deficiencies to overwatering or disease. Yellow leaves often suggest overwatering or poor drainage, while dark spots might be a sign of fungal infection.
- Wilting: While wilting can simply mean that your plant needs water, if it occurs despite regular watering, it could be a sign of overwatering, poor drainage, or a root disease.
- Stunted Growth: If your herbs are not growing as expected or have stopped growing altogether, this could be due to insufficient light, nutrient deficiency, or compacted soil.
- Sparse or Leggy Growth: This often indicates inadequate light. Herbs that do not receive enough sunlight will stretch toward the light source, resulting in long, weak stems with sparse leaves.
- Dropping Leaves: This can be caused by a variety of stress factors including drastic temperature changes, underwatering, or overwatering.
- Powdery Mildew or Other Fungal Growth: White powdery spots or other unusual fungal growths on the leaves or stems are signs of fungal diseases, they are often exacerbated by poor air circulation or too much humidity.
- Pests: Visible bugs or the telltale signs they leave behind, such as sticky residue or webbing, indicate pest issues. Pests not only damage the plants by feeding on them but can also spread diseases.
- Leaf Curling: Leaves that curl inward or roll up can be a reaction to too much light, pest attacks, or dehydration.
- Roots Coming Out of Drainage Holes: This is a sign that the plant has outgrown its pot and the roots are searching for more space and nutrients.
- Brittle or Scorched Leaves: These symptoms are often a result of too much direct sunlight or exposure to very high temperatures.
Recognising these signs early can help you take swift action to remedy the situation, whether it involves adjusting the watering schedule, moving the plants to a sunnier or more protected area, or treating diseases and pests organically.
Healthy Herbs: Essential Troubleshooting Tips
Navigating common issues in herb gardening requires understanding and quick action. Here are some effective troubleshooting tips to help your herbs thrive, tackling everything from water management to pest control.
- Seed Viability Test: If you’re planting herbs from seeds and are unsure about their viability, you test this by placing a few seeds in damp paper towel and enclosing them in a plastic bag. Place the bag in a warm area and check after a few days to see if the seeds have sprouted.
- Over/Under Watering: Rather than watering on a set schedule, instead check soil moisture by feeling the top part with your finger; water only when it’s dry down to your first knuckle. In hotter climates you can help retain moisture by mulching with organic materials such as bark, clay pebbles or cocoa mulch.
- Poor Drainage: UsIng pots with proper drainage holes and a well-draining potting mix adding perlite or sand if needed will help with this. Adding coarse materials like gravel, pebbles or broken pottery pieces at the bottom of pots can help prevent your soil compacting and blocking drainage holes. Keeping pots off the ground using pot feet or racks can help improve drainage as well.
- Nutrient Deficiencies: Mix compost or worm castings into the soil to provide a slow, natural release of nutrients. Additionally, apply a liquid fertilizer designed for edible plants every few weeks during the growing season to boost nutrient levels.
- Insufficient Light: Position pots in the brightest area possible, ideally where they can receive at least six hours of direct sunlight. For indoor herbs, use a grow light or place them near a window that receives the most sunlight, supplemented with reflective surfaces to maximise light exposure. If finding natural light is difficult, there are a range of grow lights that will keep your herbs thriving in low light conditions.
- Temperature Fluctuations: Protect potted herbs from extreme temperatures by moving them to shaded areas during hot weather, to sunny, sheltered spots during cold snaps, or indoors with either.
- Pot Size Limitations: Regularly check if herbs are becoming root-bound by gently lifting the plant to inspect the root ball. Repot into larger pots or containers with fresh potting mix as needed to accommodate root growth and prevent crowding. You can also root prune your herbs by trimming a third of the root mass before replanting, this encourages new growth.
- Pest Infestations: Herbs can attract various pests like aphids, spider mites, and whiteflies, which feed on plant sap and weaken the plant. Avoid this by regularly inspecting your plants and use a spray made from neem oil or a mild soap solution for a natural deterrent.
- Air Circulation/Disease: Promote good air circulation by giving them enough room. Regularly pruning herbs to prevent overcrowding and keeping them up off the ground can also help with air circulation. Apply a baking soda spray as a preventative measure against fungal diseases, and remove any affected plant parts immediately to prevent spread.
By staying vigilant and employing these tips, you can swiftly address common challenges and help keep your herbs healthy and happy.
The Joy of Harvesting: Tips for Harvesting, Using and Preserving Your Homegrown Herbs
Harvesting Herbs
Harvesting your own herbs provides a sense of accomplishment and brings amazing aromas and flavours to your kitchen!
- Optimal Harvest Time: The best time to harvest herbs is in the morning after the dew has evaporated, but before the sun gets too hot. This is when the plant’s oils are at their peak and helps the herbs retain their maximum aroma and taste, which are more concentrated at this time.
- Trimming for Growth: Regularly harvesting or trimming your herbs can actually encourage them to grow fuller and bushier. This is particularly true for herbs like basil and mint. Pinching off the top set of leaves can stimulate the plant to branch out, leading to more leaves and a longer lifespan.
- Herbs as Perennials: While many gardeners treat herbs as annuals, several, like rosemary, thyme, and mint, are actually perennials and can grow year-round, some for many years with the right climate and care. In colder climates, potted perennial herbs can be brought indoors during winter months.
Using Fresh Herbs
- Cooking:
- Seasoning: Fresh herbs can be chopped and added to dishes as a seasoning. They are often stirred into recipes at the end of cooking to preserve their flavor and color.
- Marinades: Herbs such as rosemary, thyme, and cilantro can be used in marinades to infuse meats, fish, or vegetables with additional flavors.
- Sauces and Dressings: Basil in pesto, cilantro in salsa, and dill in tzatziki are just a few examples where herbs are the star of sauces and dressings.
- Baking:
- Doughs: Finely chopped herbs like rosemary or thyme can be mixed into bread doughs, scone or muffin mixtures, or pastry for savoury baked goods.
- Garnishes: Fresh herbs can also be used as a garnish on top of baked dishes, such as focaccia topped with rosemary.
- Beverages:
- Infusions: Herbs such as mint, basil, or lavender can be infused in hot water to make teas or steeped in spirits to create flavour filled drinks.
- Cocktails: Fresh herbs are essential in many cocktails for both flavour and garnish, like mint in mojitos and basil in gin basil smashes.
- Salads:
- Salads: Fresh herbs like parsley, cilantro, or dill can be mixed in with leafy greens to add a burst of flavour.
- Salad Dressings: Finely chopped herbs can be whisked into vinaigrettes and creamy dressings to enhance their flavour.
- Garnishing:
- Adding Freshness: Sprigs of herbs or finely chopped leaves can be sprinkled over finished dishes like soups, stews, pizzas, and pastas to add a fresh, vibrant touch.
- As a Bed for Cooking:
- Flavour Base: Herbs like dill or fennel fronds can be laid under fish or meat when roasting or grilling to impart subtle flavours during the cooking process.
- Herbal Butters and Oils:
- Compound Butters: Softened butter mixed with herbs like garlic and parsley make delicious spreads for bread or on top of steaks.
- Infused Oils: Olive oil infused with herbs like basil or thyme can be used for cooking or as a dipping oil for bread.
- Pickling:
- Pickle Flavouring: Fresh herbs are often added to pickling brines, giving pickled vegetables an extra layer of flavour.
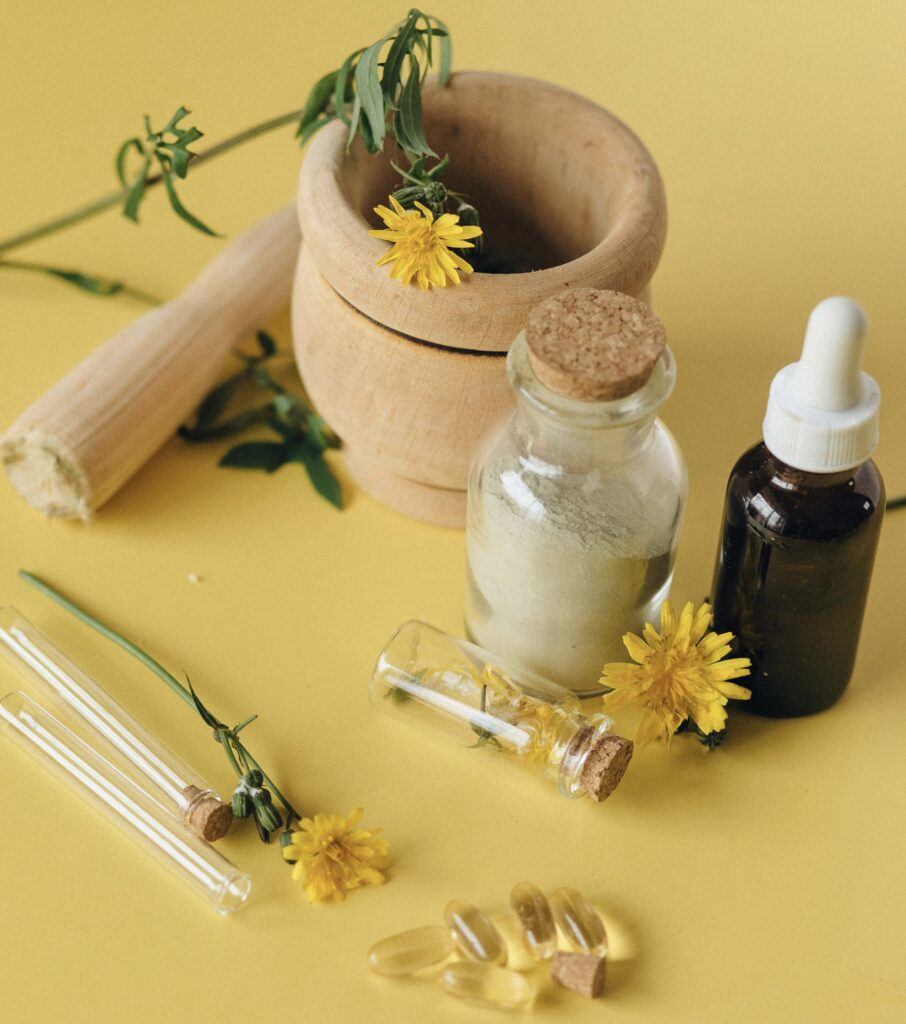
- Medicinal and Aromatic Uses:
- Aromatherapy and Medicinal: Beyond the kitchen, herbs like lavender and mint are used in aromatherapy for their calming and soothing properties. Herbs can also be used in a myriad of medicinal creams, tinctures etc as well as in the home for cleaning or freshening air or furniture.
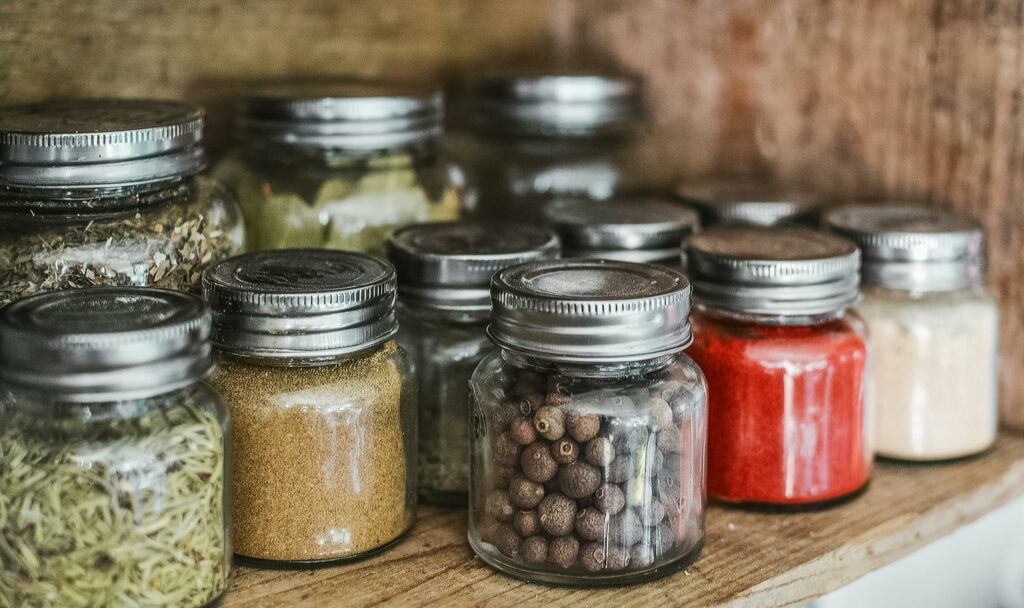
Preserving Herbs
Preserving is a fantastic way to extend the freshness and flavour of your garden herbs making them available all year round. There are several methods to consider, each suitable for different types of herbs and culinary uses:
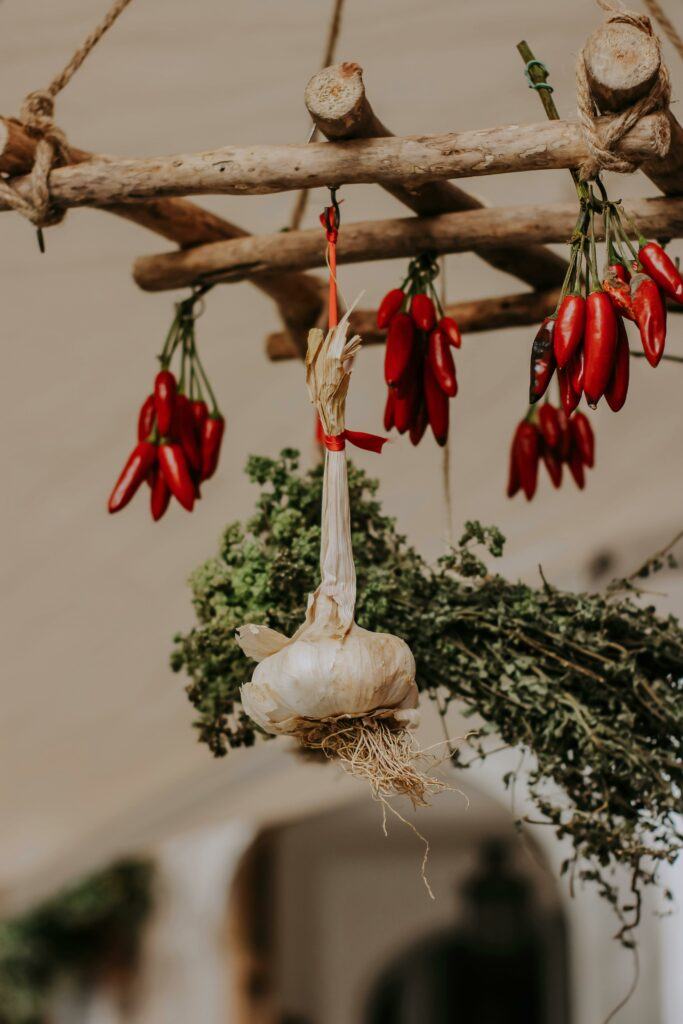
- Drying:
- Air Drying: Hang bunches of herbs upside down or lay them on a rack in a warm, dry, and well-ventilated area.
- Oven Drying: Place herbs on a baking sheet and dry at the lowest oven setting with the door slightly ajar.
- Microwave Drying: Dry herbs between paper towels in short bursts, checking frequently to prevent burning.
- Dehydrator: Use a dehydrator set at low temperatures to dry herbs while preserving their colour and flavour.
- Freezing:
- Freezing in Water: Chop herbs and freeze them in ice cube trays filled with water.
- Freezing Dry: Lay herbs on a baking sheet to freeze individually, then store in freezer bags.
- Freezing in Oil: Freeze herbs in oil within ice cube trays.
- Making Herb Pastes or Pesto:
- Blend herbs with oils to make pastes or with other ingredients for pesto. Store in the refrigerator or freeze in ice cube trays for extended use.
- Infusing:
- Herb Oils: Submerge herbs in oil In an airtight jar and store in a cool, dark place.
- Herb Vinegars: Submerge herbs in vinegar for flavourful dressings and marinades.
- Preserving in Salt:
- Alternate layers of herbs and salt to dehydrate and flavour the salt, suitable for cooking.
- Refrigerating:
- Fresh in a Jar: Store herbs like parsley or basil in a jar of water, covered loosely with a bag in the fridge.
- Between Damp Paper Towels: Wrap herbs in damp paper towels and place them in a resealable bag in the fridge.
- Preserving in Sugar:
- Herb-Infused Sugars: Layer clean, dry herbs with granulated sugar in a jar to create flavoured sugars perfect for baking, teas, or topping fruit.
- Herb Sugared Candies: Boil herbs in a sugar solution until crystallized for decorative and edible sweet treats.
- Preserving in Honey:
- Herb-Infused Honey: Submerge herbs in honey in a jar, stir occasionally, and let them infuse for at least a week. Great for bread, teas, or with dairy products.
- Honey Paste: Blend fresh herbs with honey into a paste for immediate use or storage in the refrigerator for use in dressings, marinades, or glazes.
- Making Herb Syrups:
- Simple Herb Syrup: Boil equal parts water and sugar, add herbs, steep, then strain for use in beverages or desserts.
- Thick Herb Syrup: Use a higher sugar ratio (two parts sugar to one part water), add herbs while boiling, and use the thicker syrup for pancakes, waffles, or ice cream.
Tips for Preserving Herbs:
- Choose the Right Time: Harvest herbs in the morning after the dew has evaporated but before the sun is hot to maximize flavor and freshness.
- Prep Properly: Wash and dry your herbs thoroughly to remove any dirt, bugs, or pesticides. This is especially important if you’re freezing or drying the herbs.
- Label Everything: Label your preserved herbs with the date and name of the herb. Some herbs can look very similar once dried or chopped.
- Optimal Storage: Store dried herbs in a cool, dark place to prolong their life. Keep frozen herbs in airtight containers or bags to prevent freezer burn.
- Periodic Checks: Regularly check stored herbs for signs of spoilage like mold or off smells, especially those preserved in oil or water.
Growing Food: A Holistic Approach to Health and Wellness
Over the many years working in various roles as a Registered Nurse, and through my academic journey in obtaining my Masters degree and lecturing in Occupational and Environmental Health and Safety, I have been continually amazed by the extensive health benefits that gardening gives freely. Gardening is not just a hobby, it’s a holistic activity that offers numerous physical and psychological health benefits that are good for your soul!
Physical Exercise: Gardening can be a vigorous workout, similar to a gym session. Activities like weeding involve squatting and lunging, while carrying supplies and using tools like rakes engage and strengthen various muscle groups. It’s common for those new to gardening to feel a bit sore after a big day in the garden! Even a gentler session in the garden stretches and strengthens muscle groups and put joints through their range of motion.
Adaptability: Gardening can be tailored to everyone’s abilities. Whether movement is a challenge or you’re simply looking to unwind, tools such as garden stools, raised beds, and lightweight pots help make gardening accessible and enjoyable. Opting for smaller bags of supplies like mulch or soil also makes the activity suitable for lighter exercise.
Dietary Benefits: Growing your own herbs, vegetables and fruits can significantly improve your diet, as you eat what you grow! Your food is fresher and packed full of beneficial nutrients like antioxidants and vitamins and homegrown produce always tastes so much better!
Mental Health: Spending time outdoors in the sunshine, engaging with nature and performing routine garden care provides a calming therapeutic rhythm to daily life that reduces stress, enhances your mood, improves your self esteem and overall mental well-being.
Social Connections: Sharing experiences and produce with neighbours or participating in community food swaps can help build lasting connections and friendships, support networks and foster a sense of belonging within your community.
Medicinal Uses of Herbs: Beyond cooking, many herbs have medicinal properties or can be used in other household applications. For example, lavender is excellent for creating natural air fresheners, chamomile can be used in homemade skin treatments, and mint is a natural rodent repellent. If you would like to explore these further, a favourite book of mine is Rosemary Gladstar’s Herbs: A Beginner’s Guide.
Wrapping Up Our Green Adventure
Well, we’ve dug into everything from the sunny spots herbs love to the right kind of dirt they thrive in. We’ve picked out the perfect herbs for your climate, figured out what to do when things look a bit wilted, and even celebrated the harvest of your very own, homegrown flavours, there’s not much we haven’t covered and hopefully you are filled with the how and ready to get going!
Gardening’s not just for kicks—it’s a full-blown love affair with nature, and it’s as rewarding as it is tasty. Whether it’s your first time with dirt under your nails or you’re a seasoned pro, there’s always a little more to learn and plenty of surprises along the way.
So, what’s next? If I’ve sparked an interest within to dive a little deeper, learn more about these wonderful plants, I have shared below three of my all time favourite books around herb growing, delicious inspiration for their use in the kitchen and the many medicinal and other uses they have. So check them out, be warned though it is a little addictive, but in a very healthy way! Maybe you are happy to now go forth, start a little herb garden in pots and just enjoy the fresh herbs as they come. Whatever your path, keep those green thumbs busy, and feel free to shout out in the comments or tag us on social media with your herb triumphs and challenges. We’re all growing together!
Happy planting—and here’s to making your meals a little more magical with a sprinkle of homegrown herbs!
If You’d Like to Dive Deeper into Herb Gardening – Here’s Some Great Books I Highly Recommend!
The Urban Farmer: How to Create a Productive Garden in Any Space by Justin Calverly
The guide for anyone who dreams of living the country life in the city by growing their own healthy, sustainable fruit and veg – and more!
Producing our own fruit, vegetables, herbs, eggs and honey is perfectly possible in a suburban space, and this practical guide will help urban dwellers develop a more sustainable existence. With a deep knowledge of permaculture and organic gardening, horticultural expert Justin Calverley shows you how to establish a diverse urban farm, whether in your own backyard, a courtyard or even a balcony.
Justin advocates observing and following nature’s cycles and patterns as the best way to a sustainable and productive garden.As well as growing fruit and veg, The Urban Farmer explains how to take up bee-keeping, chook care, propagation, maintaining your plot and preserving your patch’s bounty. So be inspired and get cracking with your own personal garden of Eden!
The Cook’s Herb Garden: Grow, Harvest, Cook by Jeff Cook and Marie Pierre
From your garden to your table, and every step in between, this lovely book will guide you through planting, growing, harvesting, and cooking herbs.
There’s a visual index of 120 culinary herbs and more than 30 delicious recipes to make with them. You’ll be able to prepare your own salad dressing, marinades, flavored butter, pesto, herbal teas, and cordials, and add seasoning to your favorite meals.
Whether you have a vegetable garden or want to fill some plant pots or window boxes, this book provides all the advice you need to start growing herbs. It gives you beneficial information on which herbs do well in different environments and situations. Learn the groups of herbs that like to grow together and create different selections like Mediterranean, everyday essentials, and salad herbs.
This book is a beautiful guide for the modern day homesteader. From learning how to incorporate herbs and essential oils around your home, to learning how to enhance your family’s health and well-being, this book is the go-to resource for those wishing to live a more natural homesteading lifestyle. This book takes readers through the basics of herbalism, including the different types of herbs and their uses. It also breaks down how herbs are used in tinctures, salves, essential oils, and infused oils. You’ll learn how to efficiently incorporate herbs into your lifestyle, creating your own herbal remedy cabinet


Leave a Reply